100% Security Verified | No Subscription Required | No Malware

Ever since video cameras were invented, there have been various technological advancements in filming. And today, people generally use smartphones or portable cameras to record videos. But one of the interesting ways in which smart devices can capture moments is by using the timelapse feature. Timelapse files are a way of videography in which the camera or smart device captures frames in intervals of a few seconds or minutes.
In this way, you get a stop motion-like video at the end. This format of the video is both interesting and can be used to capture long hours of activities. But often we are needed to convert time-lapse to normal video to export or share them over a platform. For these requirements, different applications are available across multiple operating systems.
Content Table
- Powerful AI for effortless content creation.
- Intuitive, professional yet beginner-friendly.
- Works on Mac, Windows, iOS, and Android.


Part 1. Convert Time-lapse Video to Normal on Computer
Computer users aiming to conserve the value of their time-lapses as videos can resort to Filmora. The Filmora program is a fee-based software that furnishes very productive video editing capacities. As an alternative, one can choose its trial edition for free. Here is how to turn your time lapses into videos by Filmora:
First, click on the "Get Started for Free" button below. This will start the download of the Filmora trial version. For converting time-lapses into normal videos, the premium version is not necessary. After the application is downloaded and installed on your PC, open it by clicking its icon.
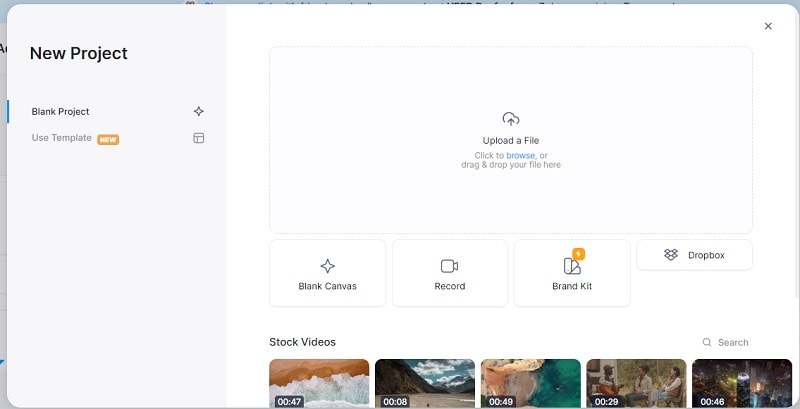
Step1Create a New Project
When the Filmora interface opens, navigate to "Create Project" and select "New Project" to create a project.

Step2Import Your Timelapse File
After the new project is opened, click on "Import" to add the timelapse file you want to convert.

Step3Adjust Speed Settings
Click on the option that says "Speed" to go to speed settings. Change the speed from 1X to a lower speed by toggling across the drag bar.

After setting a preferred speed for your timelapse, you will notice that the timelapse will seem like a normal video. When you are satisfied with the preview video, go to "Export" and click on it. This will save your converted video to your device in the highest resolution. Then you will be able to share it instantly on any platform.
Part 2. Using Time-lapse to Normal Video Converter Online
There are situations where users don't want to go installing extra applications when it comes to executing a task. And if you happen to be such a user who wants to convert your timelapse into a beautiful video, then you can do it online for free. Veed.io is an online platform that allows users to upload and convert time-lapse to normal video online easily.
Step1Access the Veed.io Website
First, open your browser and enter "veed.io" or "time-lapse to normal video converter online" in your search box. The first result that appears will be from its official website. Click on that link, and you will be directed to the veed.io online interface.

Step2Navigate the Interface
The interface will have different options like "Sign Up", "Try Sample", etc. From the available options, click on "Upload Your Video". This will allow you to edit your videos without even creating an account.
Step3Go to the Video Creation Page
The interface will direct you to the video creation page, where you'll see several templates. Click on the "Create Template" option, and an "Upload Your Media" box will appear.
Step4Upload Your Timelapse File
You can click the box to select your timelapse file or drag and drop it from any source.
Step5Adjust Playback Speed
Click on the timeline feature to access various tools at the bottom of the interface. Select the speedometer icon to control the playback speed of the timelapse.
Step6Set Your Desired Speed
You can drag the cursor from 1X to your desired speed. Click the drag button and lower the speed below 1X to your preferred setting. Check how the video renders in the preview window.

Step7Export Your Video
When you are satisfied with the changes and the video speed looks normal, go to the top right corner and click on the "Export" option. Set your preferences for video settings, then the video will be downloaded to your device.
Part 3. Change Timelapse Video to Normal on Phone
Change Timelapse Video to Normal on Android and iPhone With Filmora App
Desktop software is workable, but mobile applications are more accessible. With the Filmora App [iOS/Android], you can edit your basic video on the go. Its speed-adjustment tools convert time-lapse to normal video in a blink. Besides the linear speed, you can use the built-in curve templates and create variations in the pace.
Moreover, it helps you use customization options to create a graph of your own if the curve presets are not satisfactory. Besides video speed adjustment, the Filmora App offers basic to advanced video editing features to polish your content. From basic trimming to the application of transition templates, you can avail of each utility for video enhancement.
A Step-by-Step Walkthrough to Convert Time-lapse to Normal Video Using the Filmora App
The process of transforming a time-lapse video on the Filmora App is simple and needs no prior experience. Follow the guide below to learn how to perform this action using this time-lapse to normal video converter:
Step 1. After installing the Filmora App on your phone, open it and tap the "New Project" button to "Import" a time-lapse video from the next screen.

Step 2. When the selected video appears on the next screen, tap the video timeline track to enter the "Speed" track. Enter the "Normal" section to adjust the speed using the slider.

Step 3. Once the speed has been adjusted, navigate to the "Export" button and select the video settings on the next screen. To download the file to your device, tap the "Export" button at the bottom.

Filmora for Mobile Filmora for Mobile Filmora for Mobile Filmora for Mobile Filmora for Mobile
Edit Videos on Your Mobile Phone with 1-Click!
- • Powerful Brand New AI Features.
- • User-friendly video editing for beginners.
- • Full-featured video editing for professionals.
 4.5/5 Excellent

Change Timelapse Video to Normal on iPhone
If you are an iPhone user then you must have discovered the timelapse feature which is present in the camera app. Using the camera app, Apple users have the choice to make stunning time lapses with customized duration and settings.
And if you have a timelapse that you want to convert to a normal video format, then you can follow these steps on how to convert time-lapse to normal video:

Step 1. Ensure iMovie is installed on your iPhone. If not, download it from the App Store. Open the app and grant all requested permissions.
Step 2. Tap the "+" icon in the middle of the screen to create a new project. You can name your project at this stage if desired.
Step 3. Tap "Import"icon to access your media library. Select the timelapse video(s) you want to convert. Click on it and it will be automatically added to iMovie.
Step 4. Tap the "Speed"icon located on the bottom-left of the interface. Drag the slider to set the playback speed to less than 1X to convert the timelapse to normal speed. When you are done, click on the tick mark to save the changes.
Step 5. Preview the video to ensure it meets your expectations. Use the timeline to trim, replace, or rearrange clips as needed.
Step 6. Once satisfied, click on the "Export" option to save the video to your device or share it on any platform.
Tip: For multiple timelapse videos, import all clips first, then adjust their speed individually in the timeline.
Conclusion
Time lapse videos are an amazing way to capture moments from any device. But there are situations where we need to convert them into video format for our requirements. Luckily there are some built-in features in different smartphone devices as well as applications available on others that can help you to do so. We have discussed some of these methods following which you will easily be able to convert your timelapse into videos on any device.
FAQs about Converting Time-lapse to Normal Video
-
Will converting time-lapse to normal video reduce the video quality?
Generally, converting time-lapse to normal video by adjusting the playback speed will not reduce the video quality. The video quality mainly depends on the original video's resolution and the settings you choose when exporting the converted video. To ensure the best quality, always export in the highest resolution available in the software you're using. -
What is the difference between timelapse and normal video?
A time-lapse sequence is constructed by piecing together snapshots taken at intervals, whereas a regular video records unbroken motion in real-time. -
Can I adjust the speed of specific parts of the time-lapse video instead of the entire video?
Yes, with software like Filmora, you can adjust the speed of specific parts of the time-lapse video. You can split the video into clips and apply different speed settings to each clip as needed. This allows for more creative control over the final output.